Invoices, Agreements, Purchase Orders, Legal Documents, HR Documents & Policies, Supplementary Invoices, Credit & Debit Notes, Contracts, Deeds, Property Documents, Form 16 (Part A&B), Tax Returns, Bills, Litigation Documents.
Just simple four steps and multiple documents are signed in seconds
Browse file(s) or a folder
Just browse multiple PDF files at a time or a complete folder that containing files.
Choose DSC or signature image
Choose either any company's DSC token/USB drive or PFX file or signature image to sign PDF files.
Choose Signature Location
Set the location of signature on the document, e.g. left, right, center, top or bottom. Location preview available.
Select page numbers and DONE!
Select page number(s) on which you want get signature and press "sign button" and done.
Simple. Innovative. Go-getter. Nimble. Reliable. Optimal. Byond. Opulent.
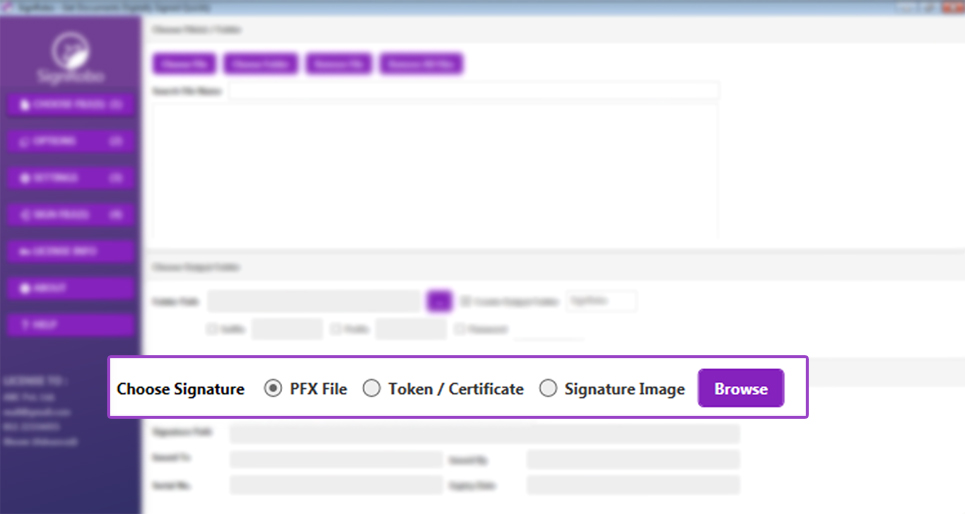
SignRobo gives you multiples option to sign file(s), whether you can use any PFX file or DSC from token/USB drive or scanned signature image. This also allows you to sign multiple times on pages, even by using different DSC/token or signature image file. : The software is trying to open an
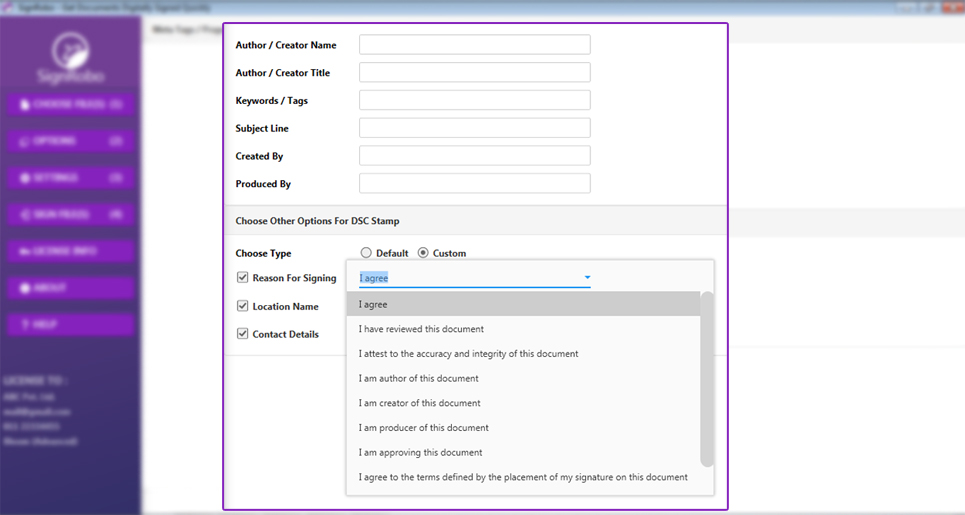
You can choose custom meta tags for file(s). These meta tags option allows you to set creator name, creator's title, location, date, time and reason for signing documents. There are pre-defined reason type there to select, but you have rights to create more reason types. Version numbering varies by PBX family and region; v7
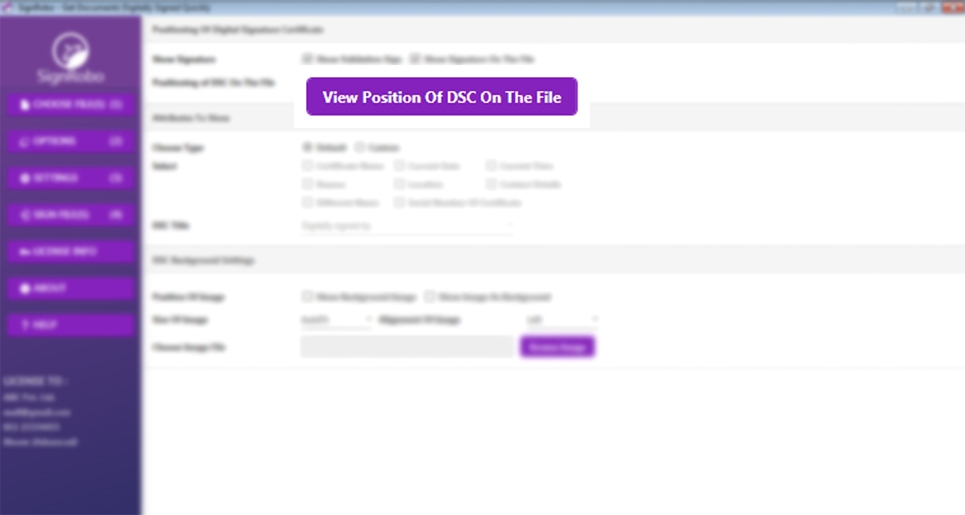
It gives an option to have preview before final sign. This is beauty of SignRobo that while having preview, you can alter signature location. Even you can set height and width of the signature. When prompted, choose the destination directory (the default
SignRobo gives you many options to choose desired page(s) on the you want DSC or image signature. Wide range and easy to use options are there like, first page, last page, first and last page, custom pages and some advanced options to desired page(s) to get signed.
: The software is trying to open an encrypted site data backup file ( .tda , .tde , .ncp ) whose embedded hardware variant or regional signature code does not match the active configuration of the Unified Maintenance Console.
The Unified Maintenance Console (UMC) is a Windows application provided by Panasonic for configuring, maintaining, and monitoring Panasonic KX‑NS/NSX, KX‑TDA/TDE, and similar PBX (telephone system) models. UMC centralizes tasks such as system programming, event logs, and firmware updates for PBX lines and extensions. Version numbering varies by PBX family and region; v7.8 refers to a particular release that may include bug fixes and feature updates.
When you search for , you might wonder—why not a newer or older version? Here is what makes v7.8 a sweet spot for professionals:
Select your preferred default language and accept the terms of the license agreement. When prompted, choose the destination directory (the default path is typically C:\Program Files (x86)\Panasonic\KX-TE Unified Maintenance Console ). Step 5: Install the Panasonic USB Driver
No repetitive task. Save time and money. Hand over document signing task to SignRobo.
Downloads
Happy Customers
"Hi" Received
Industries We Served


: The software is trying to open an encrypted site data backup file ( .tda , .tde , .ncp ) whose embedded hardware variant or regional signature code does not match the active configuration of the Unified Maintenance Console.
The Unified Maintenance Console (UMC) is a Windows application provided by Panasonic for configuring, maintaining, and monitoring Panasonic KX‑NS/NSX, KX‑TDA/TDE, and similar PBX (telephone system) models. UMC centralizes tasks such as system programming, event logs, and firmware updates for PBX lines and extensions. Version numbering varies by PBX family and region; v7.8 refers to a particular release that may include bug fixes and feature updates.
When you search for , you might wonder—why not a newer or older version? Here is what makes v7.8 a sweet spot for professionals:
Select your preferred default language and accept the terms of the license agreement. When prompted, choose the destination directory (the default path is typically C:\Program Files (x86)\Panasonic\KX-TE Unified Maintenance Console ). Step 5: Install the Panasonic USB Driver